

Last Updated: October 26, 2026
Quick Summary
To set motorcycle sag on a loaded touring bike, measure rider sag in the exact state you ride, with panniers, top box, passenger and gear aboard, then adjust preload until rear rider sag lands at roughly 30-35% of rear wheel travel. Aim for roughly 25-30% of fork travel at the front, and use static sag of roughly 10-15 mm at the rear as a sanity check on spring rate.
- Measure static sag and rider sag at both ends, taking three readings and averaging each one.
- Add preload if rider sag is too large and back it off if it is too small, re-measuring after each change.
- On a bike with around 150 mm of rear travel, rear rider sag is roughly 45-55 mm loaded.
- Record separate preload settings for solo with light luggage and fully loaded with a passenger.
- If maximum preload still misses the target, the spring rate is wrong and preload cannot fix it.
Table of Contents
- Why Motorcycle Sag Matters on a Loaded Touring Bike
- Static Sag vs Rider Sag: What Each Measurement Tells You
- Tools and Preparation for Motorcycle Rider Sag Measurement
- Step-by-Step: Measuring Sag from Fully Extended to Rider Aboard
- Motorcycle Suspension Preload Adjustment: Getting to the Target Range
- Setting Motorcycle Sag with Luggage, Passenger and Touring Load
- When Preload Cannot Reach the Target: Springs, Valving and Electronic Suspension
- Road Validation and Follow-Up Checks for Your Touring Setup
- Frequently Asked Questions
Why Motorcycle Sag Matters on a Loaded Touring Bike
Sag is the amount your suspension compresses under a given load.
A loaded touring bike makes this harder: passenger, panniers, a top box and camping gear all add weight over the rear axle, changing ride height, steering geometry and remaining travel.
Below is a step-by-step guide to measuring and adjusting sag on a heavy touring motorcycle with the load you actually ride with.
Static Sag vs Rider Sag: What Each Measurement Tells You
Static sag and rider sag measure two different things, and you need both to judge a setup. Static sag is how far the bike settles under its own weight; rider sag is how far it settles with you aboard, in your normal riding position and gear.
Static sag tells you whether the spring rate suits the bike itself: too small means the spring is too stiff, too large means it is too soft.
Rider sag, sometimes called loaded sag when luggage is added, tells you whether the spring suits the total load.
The gap between the two is your rider weight contribution, and it grows with passenger and luggage weight.
Tools and Preparation for Motorcycle Rider Sag Measurement
You need very little to measure motorcycle rider sag properly, but the prep matters more than the tools. Gather:
- A tape measure in millimetres
- A helper to hold the bike steady and read the tape
- A paddock stand or a centre stand, plus a way to lift the front
Set the bike on level ground and check tyre pressures first, because a soft tyre changes ride height. Keep the suspension at the preload setting you ride with.
A common mistake is measuring on a side stand or uneven ground, both of which skew the numbers. Get the bike upright and stable, and use a fixed measure point on the axle or swingarm you can find again for every reading, inconsistent points are the fastest way to get useless numbers.
Step-by-Step: Measuring Sag from Fully Extended to Rider Aboard
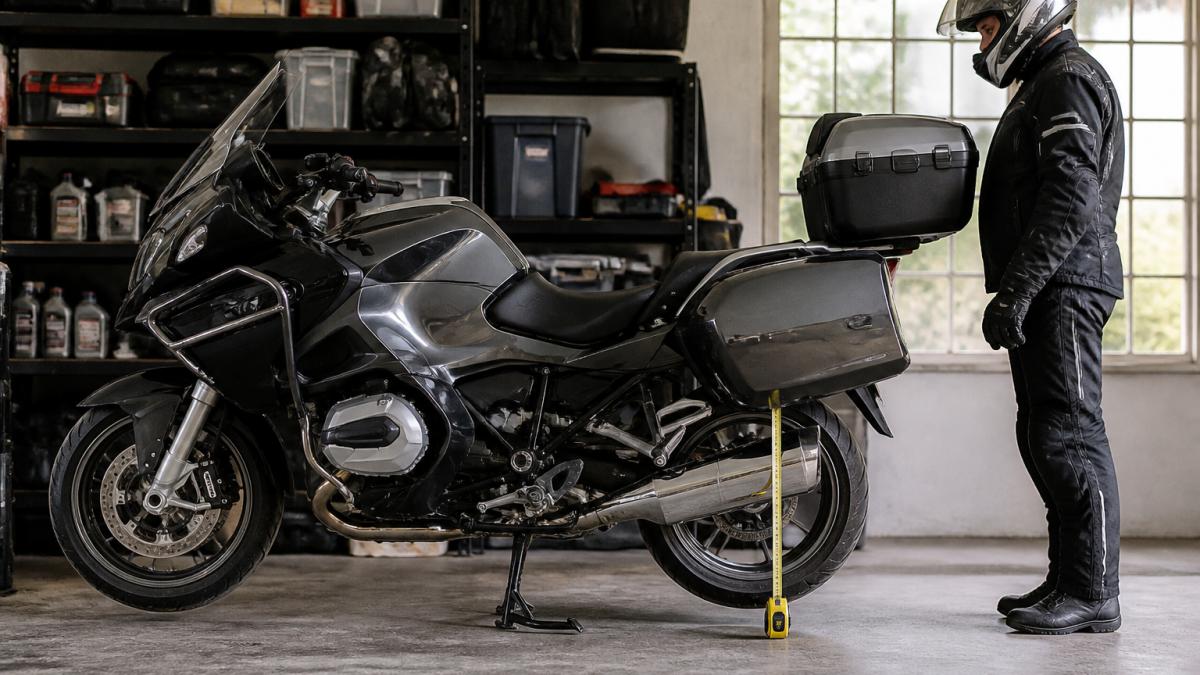
Measuring sag from fully extended to rider aboard takes three readings per end of the bike. Take your time and repeat each one.
Measuring the Bike Fully Extended
Lift the bike so the suspension hangs at full extension with no load on the wheel. Measure from your fixed point on the axle to a fixed point on the frame or tail. Record this as the extended length. Do the same at the front fork.
Measuring Static Sag with the Bike Supporting Its Own Weight
Set the bike down so it rests on its own weight, no rider. Let the suspension settle, then push down and release once to help it settle evenly. Measure again from the same points. The difference between extended and this reading is your static sag.
Measuring Rider Sag with the Rider Aboard
Now suit up and sit in your normal riding position, feet on the pegs, hands on the bars. Have your helper bounce the rear gently, let it settle, then measure. Repeat three times and average the results.
Do the same at the front, and if a reading jumps around, recheck your measure points before trusting it.
Motorcycle Suspension Preload Adjustment: Getting to the Target Range
Motorcycle suspension preload adjustment is how you move rider sag into the target range. Preload does not change the spring rate.
If rider sag is too large, add preload; if too small, back it off. Turn the adjuster in small steps and re-measure after each change.
Typical touring targets sit in a moderate range, but the right figure depends on your bike and load.
For riders on a CFMOTO 450MT who regularly swap between solo and fully loaded, the CFMOTO 450MT MZ456 Rear Shock with Hydraulic Preload Adjuster has a hydraulic preload adjuster that lets you adjust rear spring preload with a turn of a knob.

Setting Motorcycle Sag with Luggage, Passenger and Touring Load
Setting motorcycle sag with luggage means measuring in the exact state you ride, not the state the bike left the showroom in.
This is the step most guides skip, and where loaded touring setups go wrong: a bike that measures perfectly solo can sit far too low with a passenger and full luggage, so the rear squats, the front lightens and the steering feels vague.
Build the load the way you actually ride
Before you touch a tape measure, replicate the real load:
CFMOTO 450MT MZ456 Rear Shock with Hydraulic Preload Adjuster (HPA) →
- Fill the panniers and top box with the gear you normally carry, not a token bag of tools.
- Add the tank bag and any crash-bar or tail bags.
- Fit the passenger, in riding gear, in their normal position.
Riders often measure with an empty top box and then wonder why the bike wallows on day one. The load you measure with must be the load you tour with.
Touring-specific target ranges
A single dirt-bike millimetre target does not transfer to a heavy touring motorcycle. Use these as practical starting points, then fine-tune to your manual and riding:
- Rear rider sag: aim for roughly 30-35% of total rear wheel travel with the full touring load aboard. On a bike with around 150 mm of rear travel, that is roughly 45-55 mm.
- Front rider sag: aim for roughly 25-30% of total fork travel with the load aboard. On a fork with around 150 mm of travel, that is roughly 38-45 mm.
- Static sag (rear): roughly 10-15 mm on most touring bikes. Much less suggests a spring that is too stiff; much more suggests a spring that is too soft for the bike alone.
These are ranges, not absolutes: a heavy tourer with long travel and a passenger may sit toward the upper end, a sport-tourer ridden mostly solo with light luggage toward the lower. What matters is that loaded rider sag lands in range and static sag confirms the spring rate is sane.
Safe, repeatable measurement with a heavy motorcycle
A fully loaded touring bike is heavy and top-heavy. Do not balance it on a side stand while you lean over it with a tape measure. Use a two-person method:
- Put the bike on a centre stand or paddock stand on level ground.
- Have one person hold the bike upright and steady; the other takes the readings.
- Use the same fixed points every time, a mark on the rear axle or swingarm and a mark on the tail or frame, and the fork slider and triple clamp at the front.
- Before each reading, push down gently and let the suspension settle, then measure. Repeat three times and average.
- If a reading jumps by more than a couple of millimetres, recheck the measure points and the bike's stability before trusting it.
Friction and stiction cause inconsistent numbers. A light bounce before each measurement helps the suspension settle evenly, and keeping the bike vertical removes a large source of error.
Electronic suspension and powered preload
Many modern touring bikes adjust preload and damping at the push of a button, and some adapt automatically to load. The workflow changes, but the principle does not:
- Select the load setting that matches your actual setup, solo, solo with luggage, or rider with passenger and luggage.
- Let the system finish adjusting before you measure.
- Verify rider sag with a tape measure now and then, because electronic settings are only as good as the load they assume.
Do not assume an electronic 'auto' mode has nailed the sag. Measure it with the real load aboard and confirm the bike sits where you expect.
Note the setting and switch between loads
Run the numbers with the full load and adjust preload until rider sag lands in range, then note the setting. If you ride solo often, record that setting too so you can switch between the two without starting from scratch.
Use these touring-specific starting points, then fine-tune to your manual and riding.
| Measurement | Target | Note |
|---|---|---|
| Rear rider sag | Roughly 30-35% of rear wheel travel | About 45-55 mm on 150 mm travel |
| Front rider sag | Roughly 25-30% of fork travel | About 38-45 mm on 150 mm travel |
| Static sag (rear) | Roughly 10-15 mm | Less suggests too-stiff spring; more too soft |
When Preload Cannot Reach the Target: Springs, Valving and Electronic Suspension
Sometimes you run out of preload adjustment and still cannot hit the target. That means the spring rate is wrong for your load, and no amount of turning the adjuster will fix it: preload changes ride height, not the spring's stiffness.
Diagnose before you spend
Work through these checks before assuming you need new hardware:
- Confirm the measurement. Recheck tyre pressures, measure points and bike stability. A soft tyre or a slipping tape can fake a sag problem.
- Check the adjustment range. Note how many turns or clicks of preload you have used. If you are at the end of the range and still too low, the spring is too soft for the load.
- Look for a worn spring. A spring that has sagged over time, or a shock that has lost gas pressure, can leave you chasing a target you cannot reach. A suspension specialist can test spring rate and damper condition.
A common pattern is a rider who adds preload trip after trip until the adjuster is maxed out, then blames the shock. The real issue is usually that the standard spring was never rated for a passenger plus full luggage.
Your options when the spring is wrong
If the diagnosis points to spring rate, you have three realistic paths:
- Fit a spring rated for your loaded weight. This is the most direct fix when the damper is otherwise healthy. Match the spring rate to the total load, not just the rider.
- Service and revalve the damping to match the new spring. A stiffer spring changes how the damper behaves, so the valving may need to be adjusted to keep the ride controlled.
- Fit a replacement shock with more adjustment range. If the original unit has limited preload travel or is due for replacement, an aftermarket shock with threaded or hydraulic preload adjustment gives you more headroom for loaded touring.
CFMOTO 450MT riders can consider the YSS MZ456 rear shock. Kawasaki KLE500 owners can consider a YSS rear shock.


Electronic suspension: what it can and cannot fix
Electronic suspension changes the game, but it has limits. Many modern touring bikes adjust preload and damping at the push of a button, and some adapt automatically to load.
What electronic suspension cannot do is exceed its own preload range. If the system is already at its maximum load setting and the bike still sits too low, the spring is undersized for your load.
When to book a suspension service
If you have confirmed the measurements, checked the adjustment range and still cannot reach the target, a suspension specialist can test spring rate, damper condition and linkage wear. That is the point to decide between a spring change, a service and a replacement unit rather than continuing to chase the adjuster.
Road Validation and Follow-Up Checks for Your Touring Setup
Numbers on a stand only get you close. The final check happens on the road.
The bike should sit level, steer predictably and use its travel without bottoming out.
Re-check sag after any change to load, and after servicing the fork or shock. For more information, see the guide on suspension tuning for off-road riding.
Getting sag right is the difference between a touring bike that tracks calmly over a long day and one that fights you through every corner.
Frequently Asked Questions
What is motorcycle sag, and why does it matter on a loaded touring bike?
Motorcycle sag is how far the suspension compresses under a given load, measured as the difference between the fully extended length and the settled length. On a loaded touring bike it sets ride height, steering geometry and how much travel is left for bumps. If sag is too large with luggage and a passenger, the rear sits low, the front feels vague and the bike can bottom out. Setting sag first gives you a stable base before you touch damping.
How much sag should a touring motorcycle have?
Target ranges vary by bike and load, so check your owner's manual or suspension supplier first. As a general starting point, static sag with the bike supporting its own weight is often around 10-25 mm at the rear and 15-30 mm at the front, while rider sag with the rider aboard typically lands around 30-40 percent of available travel. Measure with your normal touring load, record the numbers, and adjust preload in small steps rather than chasing a single figure.
Should you measure motorcycle sag with luggage and a passenger?
Yes, if that is how you normally ride. Motorcycle sag with luggage and a passenger is the setting that matters for touring, because the load changes both ride height and the spring force needed. Measure static sag with the bike alone first, then measure rider sag with the rider, passenger and packed luggage in place. If the loaded figure is far outside the target, add preload or look at a heavier spring rather than winding in preload until the adjuster runs out of thread.
What should you do if you cannot achieve the recommended sag with preload adjustment?
If preload is at its limit and rider sag is still too large, the spring rate is too soft for your load. Adding more preload past the recommended range reduces available travel and makes the ride harsher without fixing the underlying problem. Options include a heavier spring, a shock with a hydraulic preload adjuster for quick load changes, or a rebuild with valving matched to touring loads. The CFMOTO 450MT MZ456 Rear Shock with Hydraulic Preload Adjuster ($1,240.00) has a hydraulic preload adjuster that lets you adjust rear spring preload with a turn of a knob.
