

Last Updated: November 8, 2026
Quick Summary
Set chain slack after suspension changes by finding the tightest point through the suspension travel, not the resting position, and measuring there. Compress the rear with a ratchet strap in small steps until tension stops increasing, then measure play at the midpoint between the sprockets and compare it to your manual's figure.
- Any ride height, shock length or linkage change moves the swingarm arc and shifts the chain's tightest point.
- Rotate the wheel two full turns first and mark the chain's own tight spot with a paint pen or cable tie.
- Compress the rear with a ratchet strap over a structural point, never by hand, and keep fingers clear of the sprocket.
- Torquing the axle nut can pull the axle slightly, so the second slack reading is the real one.
- If there is no measurable play at the tightest position, back the adjusters off before riding.
Table of Contents
- Why Suspension Changes Move Your Chain Slack
- Motorcycle Chain Slack Measurement: Tools and Preparation
- Step-by-Step: Setting Slack After a Shock or Ride Height Change
- Finding the Tightest Point Through Suspension Travel
- Motorcycle Chain Alignment Adjustment: Keeping the Axle Square
- Motorcycle Chain and Sprocket Inspection Before You Ride
- Book a Suspension and Chain Check at SSS Motorcycles
- Frequently Asked Questions
Why Suspension Changes Move Your Chain Slack
Setting motorcycle chain slack after suspension changes is not the same job as a routine chain adjustment.
A common problem is a rider who fits a longer shock or a lowering link, sets the chain to the manual figure with the bike on a stand, then rides out with a chain that is either banjo-tight or flopping loose. Both cause damage.
What Ride Height Does to Chain Geometry
The swingarm pivots around a fixed point. The countershaft sprocket sits above and ahead of that pivot. As the rear wheel rises through suspension travel, the distance between the two sprockets changes, and the chain is tightest at the point where the countershaft, swingarm pivot and rear axle line up most closely. That point is usually somewhere in the middle of the travel, not at the resting position and not at full extension.
- Raising the rear pulls the axle further from the countershaft at full extension, so slack grows at rest, but the tightest point in the travel can still be tighter than before if the arc has shifted.
- Lowering the rear does the reverse and can leave the chain too tight at rest, because the axle now sits closer to the countershaft through more of the travel.
- Longer or shorter shocks shift the whole arc, not just the resting point, so the tightest position moves to a different part of the stroke.
Why a Previous Adjustment No Longer Applies
If you set slack before the suspension change, that setting was correct for the old geometry. After a ride height, shock length or linkage change, the axle now travels a different path relative to the countershaft, so the chain reaches its tightest point at a different suspension position.
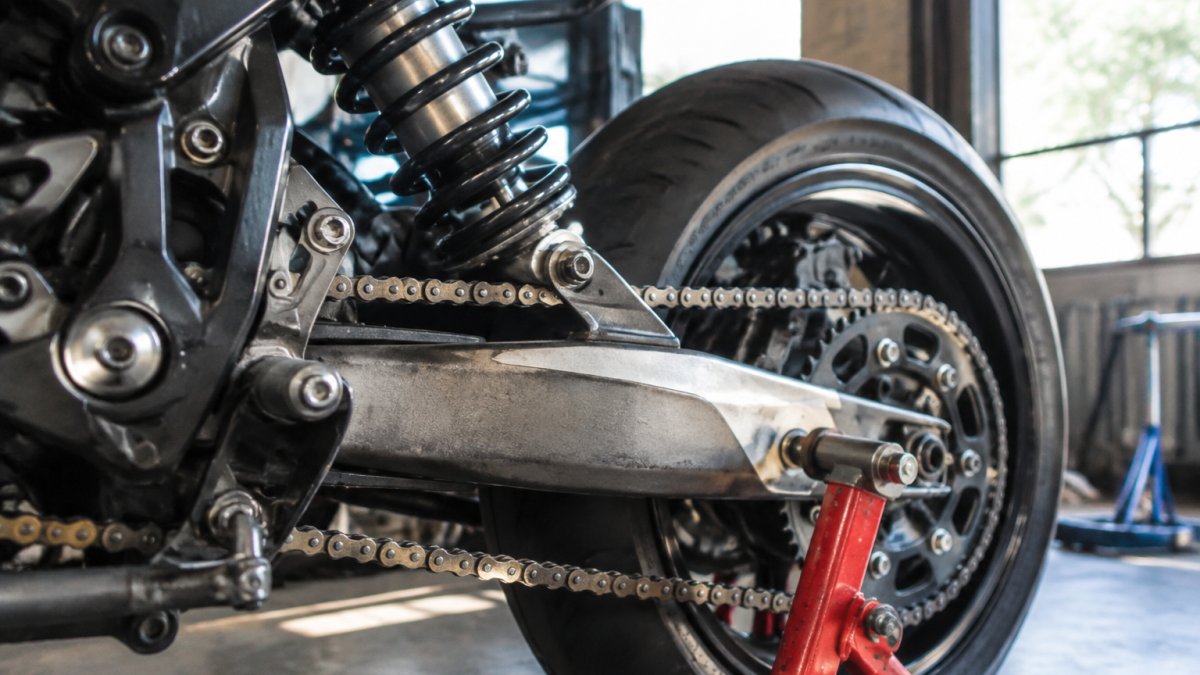
Motorcycle Chain Slack Measurement: Tools and Preparation
Motorcycle chain slack measurement starts with the right tools and a stable bike.
A typical set of tools for this job includes:
- Steel ruler marked in millimetres
- Torque wrench rated for your axle nut figure
- Rear stand or a helper to hold the bike upright
Clean the chain first. A gritty chain hides tight spots and makes measurement unreliable.
Step-by-Step: Setting Slack After a Shock or Ride Height Change
Setting slack after a suspension change follows a fixed order. Skip a step and you will chase the wrong number.
Total time: about 30 minutes Difficulty: beginner to intermediate
Step 1: Stabilise the Bike
Put the bike on a rear stand or have someone hold it upright. The rear wheel must hang free so you can rotate it and compress the suspension without the side stand interfering.
This is where most people go wrong. A bike leaning on its side stand loads the suspension unevenly and gives you a false reading.
Step 2: Loosen the Axle Nut and Adjust the Swingarm
Loosen the rear axle nut, then turn the swingarm adjusters evenly. Move the axle in small increments and check the chain between each turn.
- Loosen the axle nut, do not remove it
- Turn each adjuster the same number of flats
- Push the wheel back or forward to set the slack
The adjuster marks on the swingarm are a guide, not gospel. Alignment is also commonly checked with a straight edge or string line.
Step 3: Torque, Recheck and Test Ride
Tighten the axle nut to the torque specification in your manual, then recheck slack. Torquing can pull the axle slightly, so the second reading is the real one.
Take a short test ride, then measure again. If the slack has changed, the adjusters may have moved or the chain may have a tight spot.
Here is the order to follow so you set slack against the right condition, not the resting position.
| Step | What to do | Key detail |
|---|---|---|
| 1 | Stabilise the bike | Rear stand or helper; wheel must hang free |
| 2 | Loosen axle nut and adjust swingarm | Turn each adjuster the same number of flats |
| 3 | Torque, recheck and test ride | Torquing can pull the axle slightly; second reading is real |
| Total time | About 30 minutes | Difficulty: beginner to intermediate |
Finding the Tightest Point Through Suspension Travel
The tightest point on a motorcycle chain through suspension travel is where the countershaft sprocket, swingarm pivot and rear axle are closest to alignment, and that is rarely at rest. To find it reliably, you need to separate two things: the tight spot in the chain itself, and the tightest suspension position. Most riders confuse the two and set slack at the wrong place.
Step 1: Find the Chain's Tight Spot Through a Full Wheel Rotation
Before you touch the suspension, rotate the rear wheel slowly through at least two full turns and watch the lower chain run. Chains wear unevenly, so one section will run tighter than the rest. Mark that section, a dab of paint pen on a link, or a cable tie around the chain, so you can return to it. If you set slack at a loose section, the tight section will end up over-tensioned once the wheel rotates.
- Lift the rear wheel clear of the ground on a stand so it spins freely.
- Rotate slowly and feel the lower run with light finger pressure.
- Mark the tightest link and note its position relative to the rear sprocket.
Step 2: Compress the Suspension Safely
Compressing the rear suspension by hand is unsafe and imprecise. Use a ratchet strap or tie-down over the rear subframe or seat, hooked to a solid floor anchor or stand, and draw the rear down in small increments. Have a helper steady the bike, or strap the front wheel so it cannot roll. Never put your hands or fingers between the chain and sprocket while the suspension is compressed, a sudden release can trap them.
- Strap over a structural point, not bodywork or the seat foam.
- Compress in small steps and check chain tension at each step.
- Watch the lower run as the axle rises; tension increases as the three points align.
Step 3: Measure at the Tightest Point
With the suspension held at the tightest position and the marked tight link on the lower run, measure slack at the midpoint between the front and rear sprockets. Push the chain up and pull it down, and record the total movement in millimetres.
- Measure at the same point on the lower run each time.
- Record the figure before and after adjustment.
- Recheck after torquing the axle nut, because torquing can pull the axle slightly.
Watch out: if the chain has no measurable play at the tightest suspension position, it is already over-tightened, back the adjusters off before riding, even if the at-rest figure looked correct.
Model-Specific Conditions Matter
Some manuals specify slack with the bike on the side stand, some with it upright and unladen, and some with a rider aboard. A few models require the suspension fully extended. If you have just changed ride height or shock settings to dial in sag, our guide on how to set motorcycle sag for a loaded touring bike walks through the setup in more detail.
Motorcycle Chain Alignment Adjustment: Keeping the Axle Square
Motorcycle chain alignment adjustment keeps the rear sprocket square to the chain line.
- Match the left and right adjuster marks as a starting point
- Check with a straight edge along the rear sprocket
- Sight down the chain from behind the bike
- Recheck after torquing the axle nut
If the chain runs off-centre on the rear sprocket, the axle is not square. Adjust one side a half-turn at a time until it lines up.
For riders tuning suspension for off-road use, our guide on suspension tuning for off road covers the setup steps that pair with this chain check.
Motorcycle Chain and Sprocket Inspection Before You Ride
Motorcycle chain and sprocket inspection should happen every time you adjust slack. A worn chain will not hold a setting, no matter how carefully you measure.
Check these points:
- Chain wear: measure across a set number of links against the manual limit
- Sprocket teeth: look for hooked or pointed teeth
- Stiff links: flex each link by hand and feel for binding
- Rust and dry spots: signs of poor lubrication
A loose chain can slap the swingarm and jump a tooth. An overtightened chain loads the output shaft bearing and can crack the cases. Both are avoidable with a proper measurement.
Book a Suspension and Chain Check at SSS Motorcycles
Suspension and chain work go together. If you have changed ride height, fitted a new shock or are chasing handling problems, the chain setting is part of the job.
At SSS Motorcycles, we handle suspension tuning, ECU performance tuning and specialised performance parts for riders across Australia.
For track riders, our track day suspension tuning guide pairs well with a chain and sprocket check.
Getting chain slack right after a suspension change takes 30 minutes and saves you a gearbox rebuild.
Frequently Asked Questions
How do suspension changes affect motorcycle chain slack?
Raising or lowering the rear changes the angle of the swingarm, which changes the distance between the countershaft sprocket and the rear sprocket. A longer shock or a ride height change pushes the axle further from the pivot, tightening the chain. A shorter shock or lowering link does the opposite. Because the chain is tightest at maximum sprocket alignment through the suspension travel, setting slack at the old ride height can leave the chain overtightened or too loose once the new geometry is in place. Always reset slack after any shock, link or ride height change.
Should I measure motorcycle chain slack with the bike on its side stand?
Follow the manufacturer's service manual for your model, because the required condition varies. Some models specify measurement on the side stand with the transmission in neutral, while others specify the bike upright and unladen. Measuring in the wrong condition gives a false reading. If you have changed the rear shock or ride height, also check slack with the suspension compressed to its tightest point, not just at rest, so you know the chain never runs out of free play.
Can incorrect chain slack damage the gearbox output shaft or rear suspension?
Yes. An overtightened chain loads the countershaft sprocket bearing, the gearbox output shaft seal and the rear shock, and it can cause premature sprocket and chain wear. A loose chain slaps the swingarm, can jump a tooth under load and risks locking the rear wheel. After a suspension change, the risk is highest because the tightest point may occur at full compression rather than at rest. Set slack with the tightest point in mind, torque the axle nut to the manual specification, and recheck after a short ride.
Do I need to adjust chain slack after changing sprockets or ride height?
Yes. A different rear sprocket size changes the axle position and the chain length required, and a ride height change alters swingarm geometry. Both affect where the tightest point falls through suspension travel. After fitting new chain and sprockets, rotate the rear wheel to find the tightest spot, set slack to the manual figure, align the axle using the adjuster marks and a straight edge, then torque the axle nut. Recheck after the first ride because new chains bed in and can loosen slightly.
