

Last Updated: November 5, 2026
Quick Summary
Suspension tuning for track days means matching spring rates, preload and damping to your weight, gear and bike. Set rider sag first, then change damping one click at a time. Track loads are higher than road loads, so precise, logged adjustments are essential.
- Set rider sag before adjusting damping, since every clicker change is judged against ride height.
- Measure free length, static sag and rider sag, then log all three readings.
- Change only one adjuster per session and record every change.
- Spring rate sets stiffness; preload only sets starting position, so do not confuse them.
- Check tyre temperatures and wear after each session as objective setup feedback.
Table of Contents
- Why Suspension Tuning Matters More on Track Days
- Motorcycle vs Car Suspension: What Changes
- Motorcycle Suspension Sag Setup Before You Touch Damping
- Front and Rear Balance, Spring Rate and Preload
- Motorcycle Suspension Damping Adjustment, One Change at a Time
- Symptom-to-Adjustment Troubleshooting
- Track Day Suspension Setup Checklist and When to Call a Tuner
- Frequently Asked Questions
Why Suspension Tuning Matters More on Track Days
Track days expose every weakness in a motorcycle's suspension. On a road, a soft fork or a tired shock is an annoyance. At speed, on a track with repeated hard braking and fast corners, it becomes a real limit on confidence and lap times. Riders often ask the same question: their bike feels fine on the road, so why does it wallow, dive or chatter once they start pushing?
The answer is that the factory setup is a compromise. Suspension tuning is the process of matching spring rates, preload and damping to your weight, your gear, your bike and the way you ride. Track days demand more precision than everyday riding because the loads are higher, the braking is harder and the same corner is taken again and again.
Done properly, tuning gives you a bike that stays predictable under braking, settles through corners and keeps the tyre in contact with the surface. Done poorly, it hides problems behind a stiffer ride. The rest of this guide walks through a repeatable, one-change-at-a-time approach so you can tell the difference.
Motorcycle vs Car Suspension: What Changes
Car suspension tuning and motorcycle suspension tuning share principles, but the details differ. A car carries weight across four contact patches and uses anti-roll bars, camber and toe to balance grip. A motorcycle has two contact patches, and the rider's body position shifts the centre of mass constantly.
This means motorcycle tuning leans heavily on sag, front-to-rear balance and damping on each end, rather than the corner weights and alignment angles used for cars. Advice written for cars does not transfer cleanly, so keep the two separate when you read setup guides.
Motorcycle suspension also varies more with rider weight and gear. Two riders on the same bike can need very different spring rates. The same bike can need different damping for a loaded touring trip and a solo track session. Plan your setup around the bike and rider in front of you, not a generic baseline.
Motorcycle Suspension Sag Setup Before You Touch Damping
Sag is the amount the suspension compresses under the rider's weight alone. It is the foundation of any setup, and it should be set before you adjust damping. Skipping this step is one of the most common mistakes riders make, because every clicker change is judged against a ride height that may already be wrong.
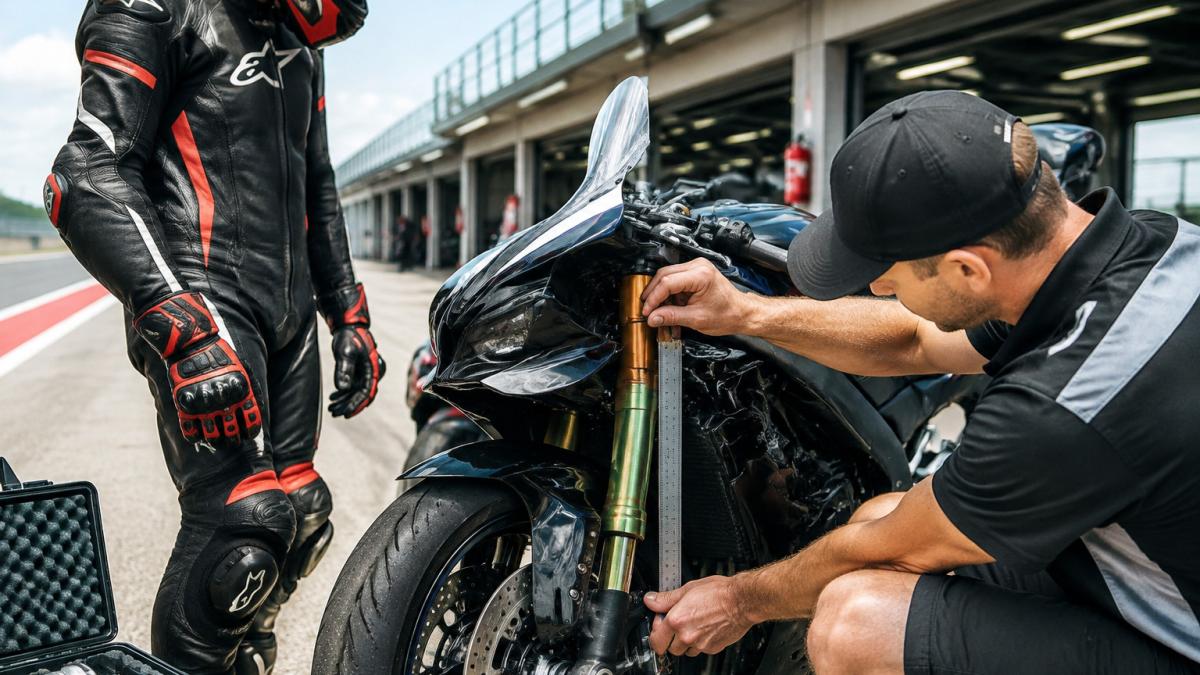
There are three measurements to take at each end, and the arithmetic matters:
- Free length, the fully extended distance between the same two reference points, taken with the bike on a stand so the suspension is topped out.
- Static sag, the distance with the bike off the stand and its own weight on the springs, no rider aboard.
- Rider sag, the distance with the rider in full track gear, seated or standing in the riding position, with the bike upright and held steady.
Rider sag is free length minus the loaded measurement. Static sag is free length minus the unloaded measurement. Record all three, because the gap between static and rider sag tells you whether the spring rate is in the right window: a spring that is too soft collapses a long way as soon as the rider gets on, while one that is too stiff barely moves.
Measure with the bike upright and supported so it cannot tip, the rider in the exact gear they will ride in, and the suspension settled by pushing down and letting it rise before each reading. Take each measurement two or three times and use the consistent figure. On forks, a cable tie around the stanchion works as a travel marker; on a shock, measure between a fixed point on the swingarm and one on the subframe or tail.
The manufacturer's rider-sag figure for your model should be your primary reference, and any target range should be treated as a starting point rather than a rule.
Keep your readings in a data sheet so changes are traceable. A simple log of front and rear free length, static and rider sag, the date, ambient temperature and track surface gives you a baseline to return to when a change makes things worse. If you have a Suzuki DRZ4S, a CFMOTO 450MT or a CRF450L, check the spring rate suits your weight before expecting damping changes to help. Our Suzuki DRZ4S suspension upgrade kit includes weight-matched springs, so it is worth confirming your spring rates first.

Watch out: measuring sag with the rider perched rather than in their riding position, or with the bike leaning on a side stand, produces numbers that look plausible but send every later adjustment in the wrong direction.
Front and Rear Balance, Spring Rate and Preload
Once sag is set, check front-to-rear balance. A bike that is much stiffer at one end can feel nervous on turn-in or push wide on exit. The goal is a platform where neither end dominates.
Spring rate is the stiffness of the spring itself. Preload only sets the starting position of the spring and does not change its rate. Riders often confuse the two. Adding preload to a spring that is too soft can restore sag, but the bike will still feel soft under hard braking. The right fix is usually a spring at the correct rate, with preload used only to fine-tune static sag.
For the CFMOTO 450MT, the stock rear shock is sprung to a specific rider range, so heavier riders or those carrying luggage often need a stiffer spring. Always check the CFMOTO 450MT YSS MZ456 rear shock listing before choosing a spring option.
CFMOTO 450MT TEKNIC FORK VALVE KIT →
For the front, the CFMOTO 450MT fork spring upgrade set offers several spring rates. Choose a rate that brings front sag into the target range for your weight and gear, then re-check balance with the rear.
Motorcycle Suspension Damping Adjustment, One Change at a Time
Damping controls how quickly the suspension compresses and rebounds. Compression damping resists the speed at which the fork or shock collapses; rebound damping resists the speed at which it extends again. Both are speed-sensitive rather than position-sensitive, which is why a bike can feel plush over a slow bump and harsh over a sharp one with the same clicker setting.
Many track-focused forks and shocks separate the circuits. Low-speed compression affects body movement under braking, turn-in and drive, while high-speed compression deals with kerbs, ripples and sharp-edged bumps. Rebound is usually a single adjuster, sometimes with a separate high-speed screw on the shock. Know which circuit each clicker on your bike controls before you touch it, the owner's manual or the fork cap labelling will tell you.
The most important discipline is one change at a time. Adjust a single clicker, ride a set number of laps or sessions, and record what changed. Changing compression and rebound together, or changing front and rear in the same session, makes it impossible to know which change caused the result.
Start from a known baseline. Note the factory clicker positions, counting clicks out from fully seated, before you turn anything. Make changes in small steps, typically two or three clicks at a time, and keep the rest of the setup constant. A useful order is to set rebound first, because it governs how the bike settles between corners, then compression, then revisit rebound once the platform is stable.
Tyre evidence is the most objective feedback available. After each session, check front and rear temperatures across the tread and note the wear pattern.
Record everything in the same log as your sag data: clicker positions, tyre temperatures, wear notes, lap-time trend and rider comments. Over a few track days this turns guesswork into a repeatable method, and it is the part most riders skip.
The CFMOTO 450MT fork valve piston upgrade kit and the CFMOTO 450MT shock piston revalve kit change the internal valving. Installation of these kits should be carried out by a professional suspension tuner with the necessary tools.


Watch out: winding a clicker to its stop to 'feel a difference' can damage the needle and seat, and it leaves you with no reference point, always count from fully seated and stay within the range the manual specifies.
Symptom-to-Adjustment Troubleshooting
Riders usually notice a symptom before they know the cause. The table below links common track-day behaviour to the adjustment to check first. Always confirm sag is correct before changing damping.
| Symptom | Likely cause | First adjustment to check |
|---|---|---|
| Front dives excessively under braking | Front spring too soft or compression too light | Confirm front spring rate, then add compression damping |
| Bike wallows mid-corner | Rear rebound too slow or rear spring too soft | Check rear spring rate, then adjust rear rebound |
| Front feels harsh over small bumps | Compression too firm for surface | Reduce low-speed compression one click at a time |
| Rear squats and pushes wide on exit | Rear too stiff relative to front, or rebound too fast | Check front-to-rear balance before changing damping |
| Chatter or instability on high-grip surfaces | Compression or rebound outside useful range | Revisit both ends with one change per session |
| Tyre wears unevenly across tread | Sag or alignment outside target | Re-check sag and bike setup before damping changes |
Work through this list in order. A common error is chasing a symptom with damping when the real cause is spring rate or sag.
Track Day Suspension Setup Checklist and When to Call a Tuner
Before your next track day, run through this checklist:
- Record rider weight in full gear, plus any luggage or tank fitment
- Confirm spring rates suit that weight before the session
- Measure static and dynamic sag front and rear
- Check front-to-rear balance
- Note the baseline clicker positions
- Make one change per session and log it
- Check tyre temperatures and wear after each session
- Re-check torque on axle and clamp bolts after the first few sessions
Some work is better left to a professional. Fork revalving, internal valve replacement and seal work all need the right tools and experience. The Suzuki DR-Z4S mail-in suspension package covers both fork and shock revalve service and includes spring selection to rider weight. For any internal work, we recommend a qualified suspension tuner. If you are unsure which option suits your bike and riding, contact SSS Motorcycles before ordering.
Search our range for the parts that match your bike, or ask us directly before you start changing anything.
Frequently Asked Questions
What suspension settings should I use for a track day?
There is no universal setting. Start from the manufacturer's baseline, then set rider sag and static sag for your weight with gear on, check front and rear balance, and adjust damping in small steps. Track conditions, tyres and rider style all change the result, so treat any published setting as a starting point and record every change in a data sheet so you can compare sessions.
How do I set motorcycle sag for track riding?
Measure static sag with the bike upright and no rider, then measure rider sag with you sitting on it in full gear and riding position. Compare both figures to the sag specifications in your owner's manual or your tuner's targets. Adjust spring preload to reach the target, then confirm front and rear sag are balanced so the chassis sits level under load.
Should I adjust suspension damping for a track day?
Yes, but only after sag and spring rates are correct. Damping controls how fast the suspension compresses and rebounds, which affects braking stability, corner entry and exit traction. Change one clicker at a time, a few clicks per session, and note how the bike behaves at turn-in, mid-corner and on the brakes before making the next change.
What should I change first when tuning suspension for a track day?
Start with the things that affect the whole chassis: tyre pressures, then rider sag, then front and rear balance. Only after those are right should you move to spring rate, preload and finally compression and rebound damping. Working in that order prevents you from chasing a symptom that a simple sag or pressure correction would have fixed.
