

Last Updated: October 30, 2026
Quick Summary
To check charging voltage after fitting accessories, measure at the battery terminals with a digital multimeter set to DC volts: first engine off, then at idle and at 4,000 RPM, with accessories on and off. Compare these readings against a baseline you recorded before fitting the accessory under matching conditions.
- A healthy fully charged battery reads around 12.6 volts or slightly higher with the engine off.
- Record a baseline before fitting the accessory, then repeat the identical test sequence afterwards.
- At 4,000 RPM with no accessories, charging voltage should sit in the low-to-mid 14 volt range.
- A drop at idle that recovers at 4,000 RPM means charging headroom is tight.
- Test multiple accessories cumulatively, adding one per cycle, to find which one exceeds headroom.
Table of Contents
- Why Accessories Change Your Charging Voltage
- What You Need for a Motorcycle Charging System Test With Multimeter
- Step 1: Measure Motorcycle Battery Voltage With the Engine Off
- Step 2: Read Motorcycle Battery Voltage While Running at Idle and 4,000 RPM
- Step 3: Test With Accessories On, Then Off, and Compare
- Step 4: Run a Motorcycle Regulator Rectifier Test
- Step 5: Motorcycle Accessory Wiring and Fuse Check
- Reading the Numbers: What Each Result Means
- Frequently Asked Questions
Why Accessories Change Your Charging Voltage
Fitting accessories changes your charging voltage because every extra electrical load pulls current from a system that was sized for the bike as it left the factory.
The result is a system with less spare capacity. Engineers call that spare capacity charging headroom.
Below, we'll show you exactly how to check motorcycle charging voltage after installing accessories, step by step, with real numbers to compare against.
What You Need for a Motorcycle Charging System Test With Multimeter
You need a digital multimeter, a fully charged battery, and about 20 minutes. A basic meter with a DC voltage setting is enough. You don't need a workshop-grade unit.
Gather these items first:
- Digital multimeter with DC volts
- A note pad or phone for recording readings
- Basic spanners to access the battery terminals
Setting the Meter Correctly
Turn the dial to DC voltage, marked as V with a straight line above a dashed line. Select the 20V range if your meter isn't auto-ranging.
Two errors ruin more readings than anything else: a meter left on AC volts, and probes touching the plastic battery posts instead of the metal terminals. Check both before you trust a single number.
Step 1: Measure Motorcycle Battery Voltage With the Engine Off
Engine-off battery voltage tells you the battery's state of charge before you test anything else. Switch the ignition off, then touch the red probe to the positive terminal and the black probe to the negative terminal.
A healthy, fully charged battery should read around 12.6 volts or slightly higher. A reading near 12.0 volts means the battery is part-charged. Anything below that and you should charge it first, because a weak battery skews every later reading.
Write the number down. You'll compare against it at the end.
Step 2: Read Motorcycle Battery Voltage While Running at Idle and 4,000 RPM
Motorcycle battery voltage while running should climb above the engine-off figure. Start the bike and let it idle, then measure across the battery terminals again.
At idle, expect the reading to sit somewhere above resting voltage but often below full charging output.
Record both numbers. The gap between idle and 4,000 RPM tells you how much the system depends on engine speed, which matters once accessories add load.
Step 3: Test With Accessories On, Then Off, and Compare
This is the step most guides skip, and it's the one that actually answers your question. A single on/off reading tells you something changed; a repeatable before-and-after protocol tells you what changed, by how much, and whether it is acceptable. Do the baseline test before you fit the accessory, then repeat it afterwards under matching conditions.
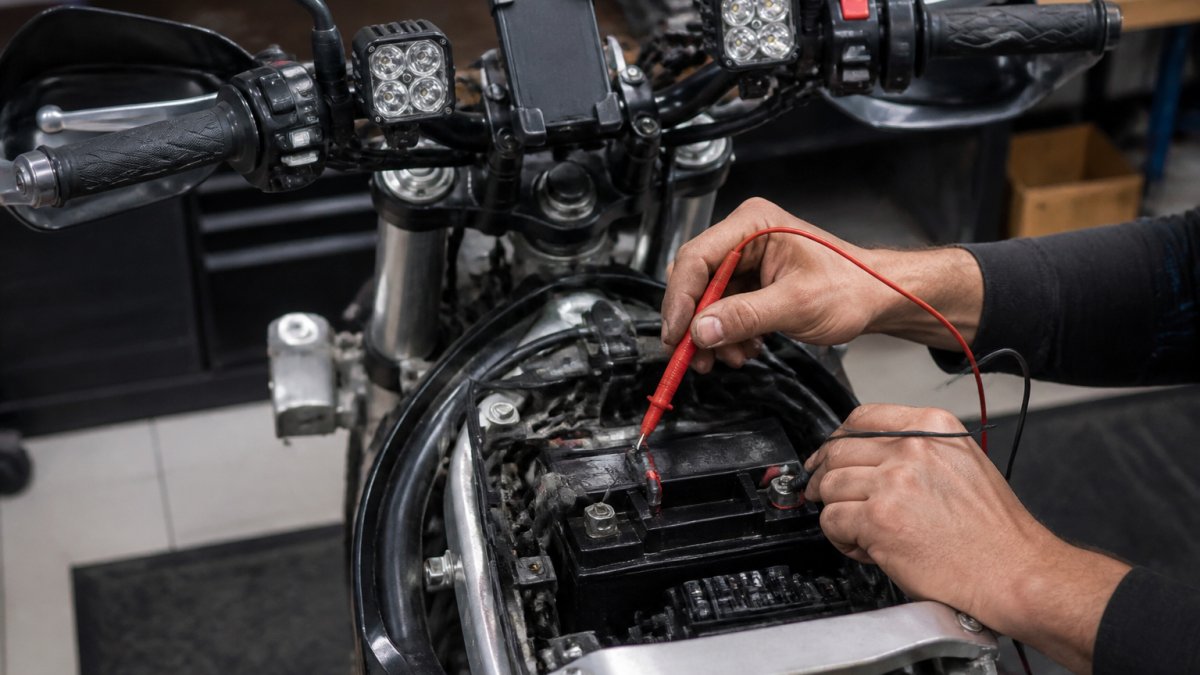
Build a Baseline Before You Fit Anything
With the accessory still in its box, run the full sequence and record every number:
- Engine off, ignition off, battery rested for at least an hour: resting voltage
- Engine idling, all factory loads as normal: idle charging voltage
- Engine held at 4,000 RPM: charging voltage
Note the ambient temperature and the battery type alongside the figures. Charging output falls in cold weather and rises slightly when the regulator is hot, so a baseline taken at 8am in winter is not comparable with a retest at 2pm in summer. If you can, take the baseline and the retest on the same day, at the same temperature, with the same battery state of charge.
Repeat the Same Tests After Fitting
Refit the accessory, then run the identical sequence in the identical order. The comparison only works if nothing else has changed: same meter, same probe placement on the metal terminals, same RPM hold, same accessories switched on or off.
Measure at the battery terminals at idle, then at 4,000 RPM, with every accessory on. Then switch the accessories off and repeat both readings. Compare the pairs against your baseline, not against a generic chart:
- A small drop with accessories on is normal and healthy.
- A large drop at idle that recovers at 4,000 RPM means you're near the limit of charging capacity.
- A drop that never recovers, even at higher engine speed, means the accessory load exceeds what the system can supply.
That last pattern is your warning sign. It won't fix itself, and it will flatten the battery over time.
Sequence the Load Test One Accessory at a Time
If you have fitted more than one item, test them cumulatively rather than all at once. Start with the smallest load, usually a phone charger or GPS mount, and add one accessory per test cycle: heated grips next, then auxiliary lights, then heated gear.
The step where voltage falls sharply is the one that pushed the system past its headroom.
Match Conditions Between Runs
Three variables wreck before-and-after comparisons: battery state of charge, engine temperature, and accessory state. A retest on a part-charged battery will read lower than the baseline even if nothing has changed. A retest on a cold engine will read differently from one on a hot engine because the regulator's output shifts with temperature. And an accessory left on by mistake will skew every figure.
Charge the battery to full before each run, let the engine reach normal operating temperature, and confirm every accessory switch is in the position you intend. If a reading looks wrong, repeat the run before you draw a conclusion from it.
Step 4: Run a Motorcycle Regulator Rectifier Test
A motorcycle regulator rectifier test confirms the charging output itself is healthy before you blame your accessories. With the engine running at around 4,000 RPM and no accessories on, measure at the battery.
The charging voltage should sit in a steady band above battery voltage, typically in the low-to-mid 14 volt range. If your bike runs ECU-controlled charging, the ECU option for your model is worth understanding before you chase wiring faults.
If you're weighing up whether the electrical strain of your accessories is worth it at all, it helps to read about whether performance tuning is worth it for adventure motorcycles before you spend more on the electrical side.
Step 5: Motorcycle Accessory Wiring and Fuse Check
A motorcycle accessory wiring and fuse check catches the faults that masquerade as charging problems. Poor connections add resistance, and resistance steals voltage before it ever reaches your accessories. It also catches the opposite problem: an accessory wired in a way that loads the charging system harder than its rated draw suggests.
Work through these checks:
- Inspect each accessory fuse and replace any that are blown or corroded
- Check that accessories are wired to a switched live, not straight to the battery
- Look for chafed wire where looms pass near the frame or steering head
Fuse Placement and Rating
Fit the fuse as close to the power source as practical, on the positive side, so that a short anywhere downstream is cleared before it can heat the loom.
Match the fuse rating to the wire gauge, not to the accessory's peak draw alone. A fuse rated above what the wire can carry will let the wire overheat before it blows.
Wire Gauge and Voltage Drop
Undersized wire is the most common cause of an accessory that works on the bench and misbehaves on the bike. Thin wire has resistance, and resistance turns voltage into heat along the run. The longer the run and the higher the current, the worse the loss.
As a working rule, size the wire for the current the accessory draws continuously, not its startup surge, and add margin for length.
Relays and Switched Versus Unswitched Circuits
Anything drawing more than a few amps should run through a relay, with the switch only controlling the relay coil. Wiring a high-draw accessory straight through a handlebar switch puts the full current through contacts that were never designed for it, and the resulting heat and resistance show up as a voltage sag at the accessory.
Decide deliberately between switched and unswitched circuits. A switched live, taken from a circuit that is dead with the ignition off, prevents the accessory draining the battery when the bike is parked.
Voltage-Drop Testing Across Wiring and Grounds
Voltage-drop testing measures the loss across a circuit while it's under load. Set the meter to DC volts, put one probe on the battery positive and the other on the accessory's positive feed.
Test the ground path separately, because a poor ground can mimic a charging fault. A ground that relies on a painted frame, a powder-coated bracket, or a bolt that also holds a plastic panel will read fine with no load and collapse under current.
Secure Grounds and Connector Condition
Inspect every connector in the accessory circuit for corrosion, loose terminals, and heat damage. A connector that has been hot will often show discoloured plastic or a hardened seal, and it will keep causing voltage drop until it is replaced rather than cleaned.
Finally, check that the accessory's own earth is not shared with a sensitive circuit. Sharing a ground with an ECU sensor or a lighting circuit can introduce noise that shows up as erratic readings on the meter and as odd behaviour from the accessory itself.
Reading the Numbers: What Each Result Means
Low voltage under load points to either a weak charging system or too much accessory current draw. Overcharging, where voltage climbs well above the normal charging range, points to a failed regulator-rectifier.
| Reading | Likely Cause | What To Do |
|---|---|---|
| 12.6V or more, engine off | Battery healthy | Proceed to running tests |
| Below 12.4V, engine off | Battery part-charged or tired | Charge and retest |
| Rises into low-to-mid 14V range at 4,000 RPM | Charging system healthy | Check accessory load next |
| Big drop at idle, recovers at 4,000 RPM | Charging headroom tight | Reduce load or upgrade output |
| Stays low with accessories on | Load exceeds capacity | Recheck wiring, then system |
| Climbs well above normal range | Regulator-rectifier fault | Stop riding, get it tested |
Interpret readings by motorcycle and battery type, too.
Watch out: testing with a flat battery or loose probes gives readings that look like a charging fault when there isn't one.
Frequently Asked Questions
What voltage should a motorcycle battery show while the engine is running?
With the engine running at idle, expect around 13.5 to 14.2 volts at the battery terminals. Rev to 4,000 RPM and the reading should climb to roughly 14 to 14.7 volts. Anything below 13 volts at 4,000 RPM points to a charging fault, and anything above 15 volts suggests the regulator-rectifier is overcharging and needs testing. Always measure at the battery posts, not at the accessory wiring, and switch off the accessories first so you get a clean baseline reading.
Can motorcycle accessories drain the battery while riding?
Yes, if their combined current draw exceeds the charging headroom your stator and regulator-rectifier can supply. A healthy system produces more than the bike needs; add heated grips, auxiliary lights and a GPS and the surplus can shrink to nothing. That is why you test charging voltage with accessories on and off. If voltage falls below roughly 13 volts at 4,000 RPM with everything running, the accessories are pulling more than the system makes and the battery is discharging as you ride.
How do you test a motorcycle charging system after installing accessories?
Start with a rested battery and measure voltage at the terminals with the engine off (expect 12.4 to 12.8 volts). Then run the engine and record readings at idle and 4,000 RPM. Repeat the 4,000 RPM reading with every accessory switched on and compare the two figures. A drop of more than about 0.5 volts under load, or a reading under 13 volts, means you need to check the regulator-rectifier, the stator output and the accessory wiring and fuse before trusting the setup on a long ride.
Should you test charging voltage with the motorcycle lights on?
Yes, as a second test. The headlight is a known, fixed load, so a 4,000 RPM reading with the lights on shows how much charging headroom you actually have. Record the baseline with everything off first, then add the lights, then add your new accessories one at a time. That sequence tells you which item is eating the surplus, and it separates a weak charging system from an accessory that draws more current than the bike can spare.
If your readings show the charging system is working but your bike still feels restricted or flat, the real limit may be in the tune, not the wiring. At SSS Motorcycles, we handle ECU performance tuning, suspension setup and electronic components for riders who want more from their machine. Get started with SSS Motorcycles and book a diagnostic check so we can confirm what your bike actually needs.
